Wired Internet Access
Lakehead University is continually upgrading its network to improve client security and help identify misconfigured devices. Lakehead University utilizes CIRA D-Zone Firewall service to prevent users from falling prey to known phishing attacks. Standardizing on Lakehead University’s DNS servers will ensure the users of our network are protected.
To connect to Lakehead University networks (wired), users will need to ensure their device is configured to get the DNS address from the University’s DHCP servers. Below are instructions for proper configuration for Mac and Windows devices.
MAC Computers Instructions
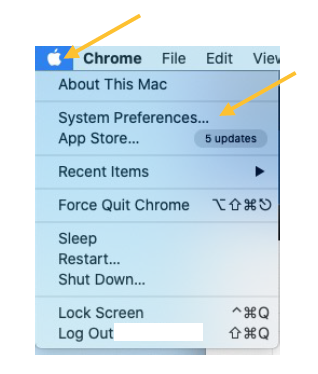
1. Click the Apple icon in the top-left corner of the screen. Click on System Preferences.
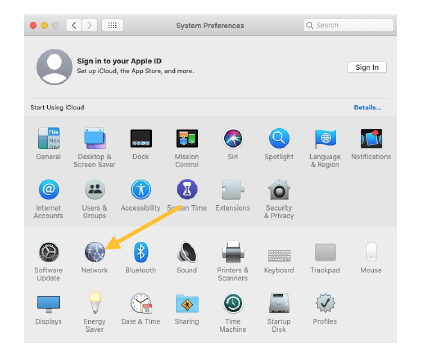
2. Click Network.
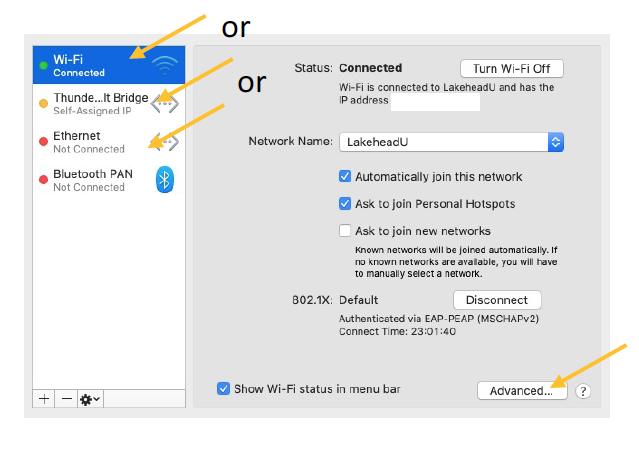
3. Click Wi-Fi as shown in this example. Or any connections that have the greenlight indicating they’re connected. Next select Advanced…
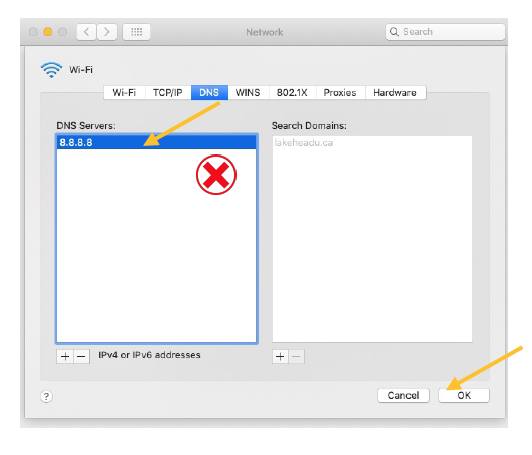
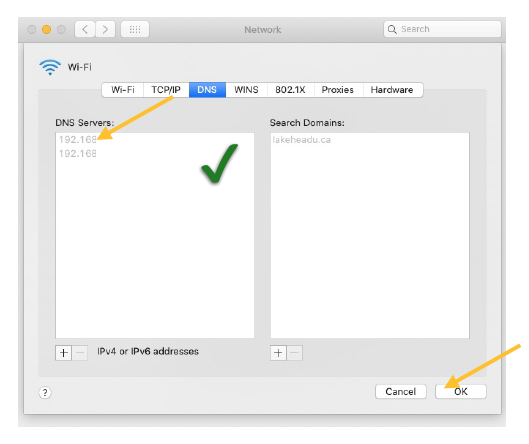
4. First select the DNS tab at the top, and if you have a settings like shown in yours please select the numbers and use the minus button at the bottom to remove it. Click OK, then Apply on the next option, shown in Step 6.
5. This is the same DNS tab showing the proper settings. This is simply automatic, no manual entry involved. Make sure to click OK once completed, then Apply on the next option, shown in Step 6.
(Note: We did remove some of the address information for security purposes)
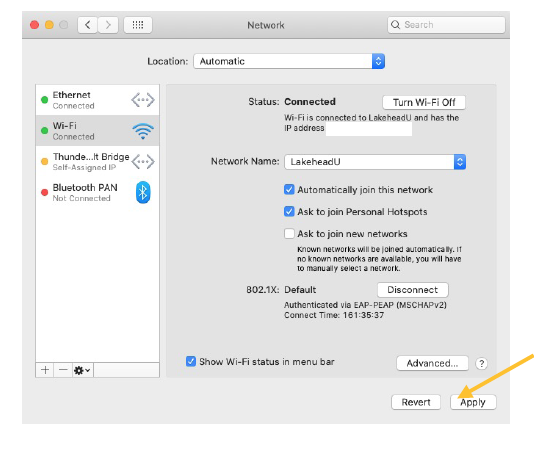
6. As the final step make sure to select Apply.
Windows Computer Instructions
1.Click on your Start Menu and click on the gear icon (Settings).
2.Select "Network and Internet" from the list of options.
3.Under Advanced Network Settings select "Change Adapter Options".
4.Right-click on your main Internet Adapter (Ethernet-Wired or Wireless Adapter) and select "Properties" from the context menu.
5.Select "Internet Protocol Version 4 (TCP/IPv4)" from the list and select the "Properties" tab.
6.Ensure that both "Obtain an IP address automatically" and "Obtain DNS server address automatically" are selected.

