

Uploading Documents & Photos
Uploading files such as .pdf documents or images are a common task when creating content for the web. Below we'll walk you through a common workflow and explain some helpful details and considerations as we go.
A reminder that the file formats available for upload are: .gif, .png, .jpg, .jpeg, .pdf, .doc, .docx, .xdoc, .ppt, .pptx, .xls, .xlsx, .dotm and the maximum file size is 10MB. Now just because the maximum file size is 10MB does not mean that this is the recommended file size that you should be uploading as these large files will severely impact the page performance on our site.
Please Note: If you need assistance ensuring your documents are AODA compliant please review the resources provided by Student Accessibility Services.
Uploading a Document for Download
- Make sure you are logged in.
- Navigate to the page that you'd like the document to be downloaded from.
- Enter editing mode by clicking the "edit" link located near the end of the content.

- Highlight the text that you want to trigger the download (click and drag). Remember it's often good practice to use the most descriptive part of the content rather than creating "click here to download" text.
- Click the link button (depicted by this chain-link icon
 ).
). - A new window will appear on your screen, from here you will want to click the "Browse" button which is to the right of the "Link URL" field (depicted by a blue and red icon).
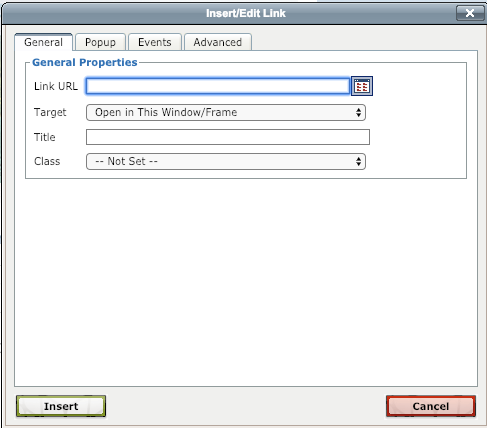
- Another window will now appear on your screen, this is the File Browser. In the left-most pane you will see a "Navigation" title, here you can navigate the File Browser where the number under the uploads folder refers to your Faculty or Department number in the file structure.
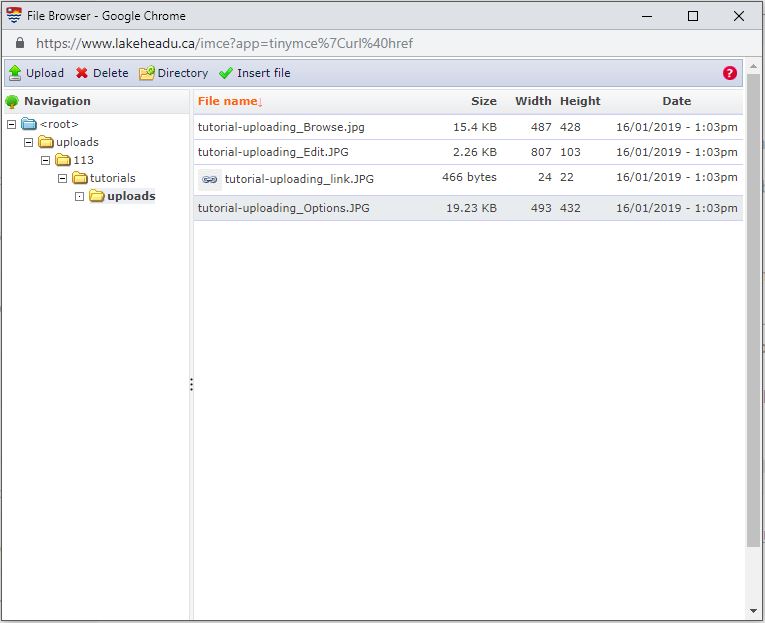
If you belong to several Faculties or Departments this can be a bit tricky, an easy way to determine which is which is to click through these folders and pay attention to the document titles in them. If you're unable to determine this please contact Web Development using our ticketing system and we can find this information for you. - Click the appropriate folder and click the "Upload" button located at the top of the File Browser. From here you will need to select the document you wish to upload and click the "upload" button.
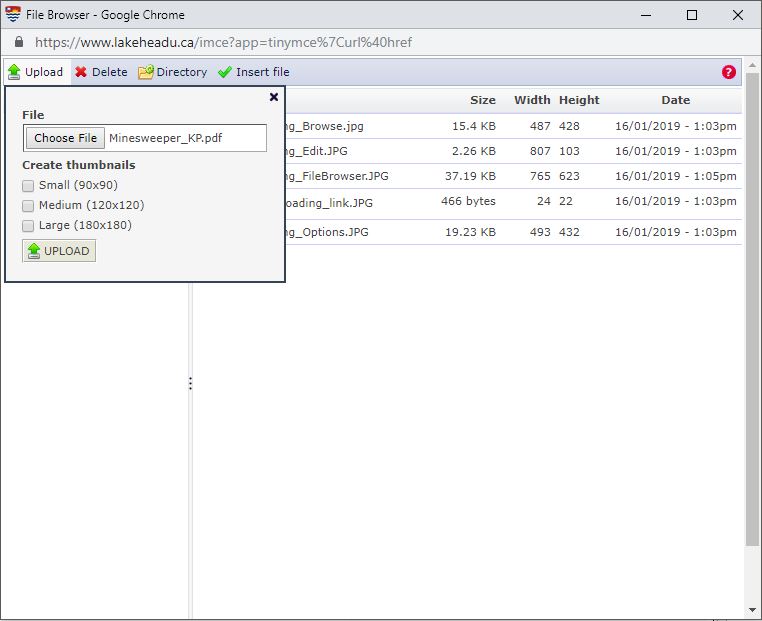
- You’ll now notice the document in the larger portion of the File Browser, double click it and it will now be linked to the highlighted text you selected.
Uploading an Image
- Make sure you are logged in.
- Navigate to the page that you'd like the image to be displayed on.
- Enter editing mode by clicking the "edit" link located near the end of the content.
- Click the area in the content where would like the image to appear.
- Click the "Insert/Edit Image" option (depicted by this tree photo icon
 ).
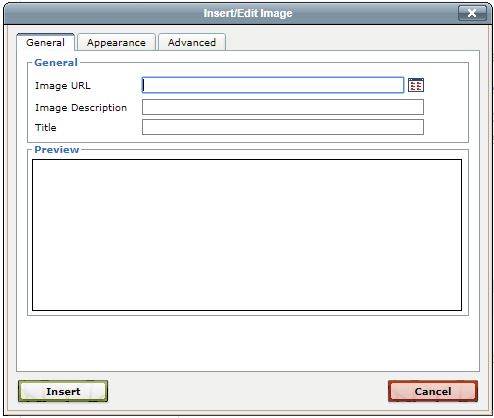
). - A new window will appear on your screen, from here you will want to click the "Browse" button which is to the right of the "Image URL" field (depicted by a blue and red icon).
- Another window will now appear on your screen, this is the File Browser. In the left-most pane you will see a "Navigation" title, here you can navigate the File Browser where the number under the uploads folder refers to your Faculty or Department number in the file structure.If you belong to several Faculties or Departments this can be a bit tricky, an easy way to determine which is which is to click through these folders and pay attention to the document titles in them. If you're unable to determine this please contact Web Development using our ticketing system and we can find this information for you.
- Click the appropriate folder and click the "Upload" button located at the top of the File Browser. From here you will need to select the document you wish to upload.
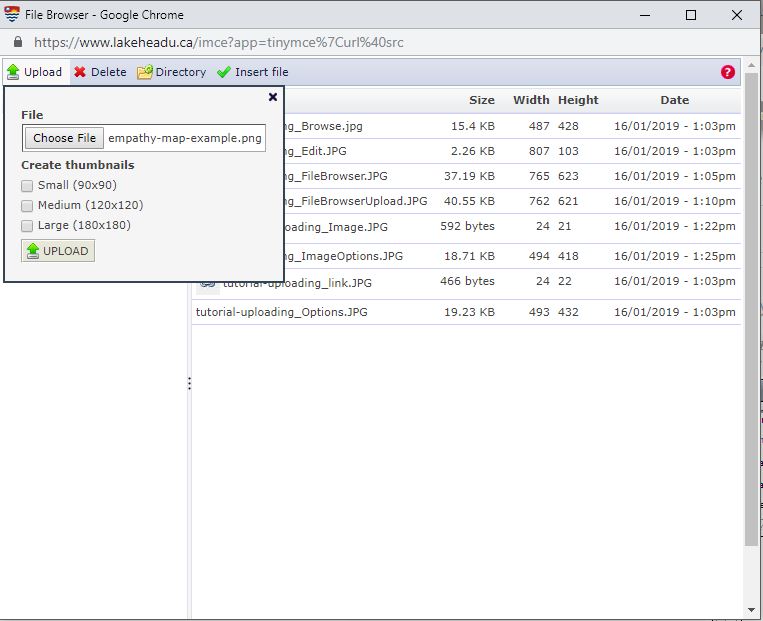
- You’ll now notice the image in the larger portion of the File Browser, double click it and it will now be displayed in the area of the page
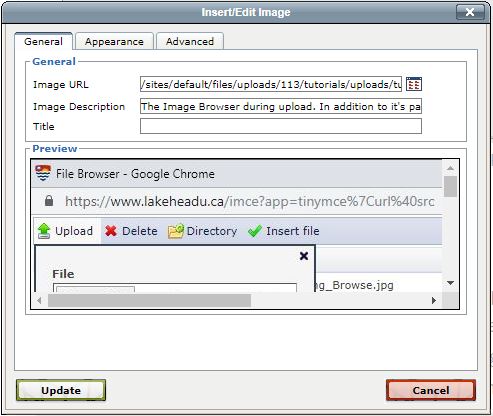
- You will be brought back to the initial menu where you'll notice that the URL has been updated. The "Image Description" field is important as this is what will be used for Alt text. Alt text is what screen readers or other assistive technology will output to describe the image content or nature to the user and is mandatory for AODA compliance.
- Click the "insert" or "update" button as appropriate and the image will now be displayed on your page.
Proper Image Formats
Now that you've learned how to upload images for your content we can take that new found knowledge a step further with Formats and Optimization. For the most part you will want to stick to the .jpg format unless dealing with opacity in which .png is the appropriate file type (logos are a good example of images that are typically .png).
Please Note: While the .png format can handle almost everything the .jpg can, it typically runs at a larger file size which can become a hindrance on performance.
Optimization, Tools and Resources
We touch on the subject of web performance a small amount during this tutorial but it's something important to consider when uploading documents or images. Do I need to be embedding this image at 4k resolution? Or can I resize and compress it? Should I be uploading a high resolution print-ready document? Or can I create a more home printer-friendly version? These are questions that do often appear and can often be forgotten due to restricted timelines. It's important to do your best to optimize and compress documents and we've listed a few tools to help you during your web journey:
- ImageOptim (Mac) - "Removes bloated metadata. Saves disk space & bandwidth by compressing images without losing quality."
- File Optimizer (Windows) - Another optimizer but it covers "More than 400 file extensions supported, being the most complete tool available of this type"
- Optimizing PDFs (Guide) - PDF Optimizer provides many settings for reducing the size of PDF files
- Microsoft Photos or macOS Photos - Free software that comes pre-installed with Windows or Mac operating systems. These will allow you to quickly crop or resize photos without the robust operations of Adobe Photoshop or similar editor suites.
File Organization and You
It's common for Faculties or Departments to have multiple levels of sub-folders in their uploads. While we don't recommend a specific structure or method for organizing these files it's worth having a discussion with your colleagues or manager to determine what may work for you. Another important point to bring up during this discussion is when a file is no longer accurate or is dated when do you remove it. To avoid confusion we do recommend removing any outdated or inaccurate files as they become replaced to avoid confusing our users.