- Instructions
- [INPUT] - Enter Data
- <ENTER> - Press the return or enter button
The GLBS is a report of transactions for any selected period of time in the
fiscal year in detail or summary format. The detail format enables the
user to print a report of every transaction during a specified period of time,
this being the main purpose of this report. (The summary format gives
the balances of the GL account by selecting which month the ending balances
would like to be reported). These reports can be printed out or can be viewed
on screen.
- In order to get to the reports:
- Load up the Datatel system and log into the Colleague Database (COLLIVE).
- Select GL - General Ledger
- Select GLB - Budget Reports
- Select GLBS - Budget Status Report
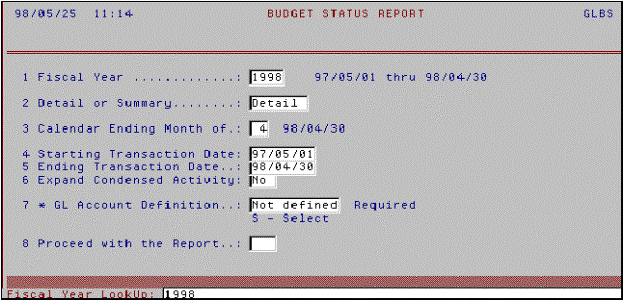
1 Fiscal Year: [INPUT] year of inquiry or <ENTER> for current
fiscal year
2 Detail or Summary: [INPUT] D for Detail or S for Summary
then <ENTER>
*NOTE* - D should be selected to receive a full listing of
account transactions
4 Starting Transaction Date: [INPUT] Starting Date <ENTER>
5 Ending Transaction Date: [INPUT] Ending Date <ENTER>
6 Expand Condensed Activity: <ENTER>. Not a required field.
7 * GL Account Definition: Not Defined - Press the [DETAIL] button
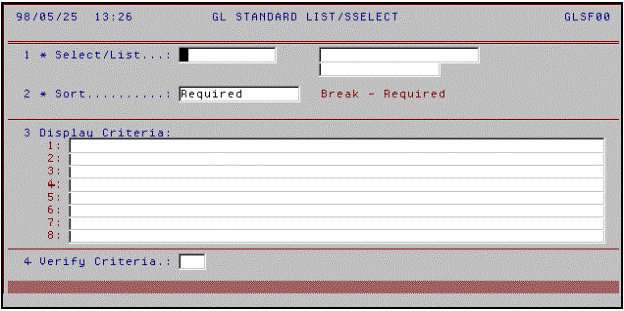
1 * Select/List: Press the [DETAIL] button
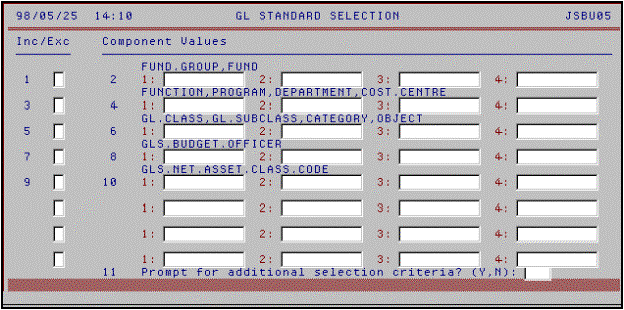
On this screen Fields 7 through 10 will not be used at this time.
In Fields 1, 3, and 5 [INPUT] I for include or E for exclude
*NOTE* - Field 5 can be left blank and then do not use Field 6, unless
a specific object code is requested. If Field 5 and 6 are left blank then
the report will print all of the Cost.Centre's Objects.
The only time exclude will be used is when the report on a Budget code may
not require all of the object codes.
Field 2: [INPUT] The fund which is the first two digits of the budget
code <ENTER>
Field 4: [INPUT] The department which is the next eight digits of the
budget code <ENTER>
Field 6: [INPUT] The object code which is the last five digits of the
budget code <ENTER>
*NOTE* - In Fields 2, 4, and 6 there is more than one window in which
to enter a budget code. Therefore it is possible to print a report with more
than one GL department.
Field 11: Prompt for additional selection criteria? (Y,N): [INPUT] N
Press [SAVE] AND <ENTER>
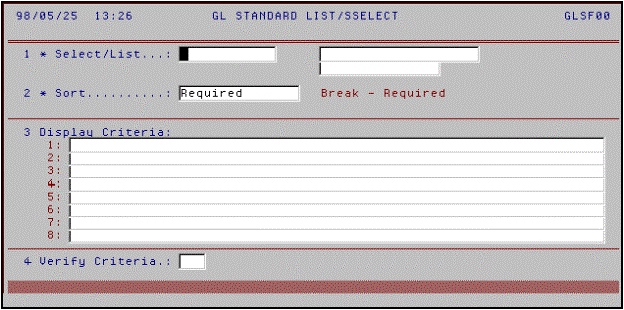
2 * Sort: Press [Detail]
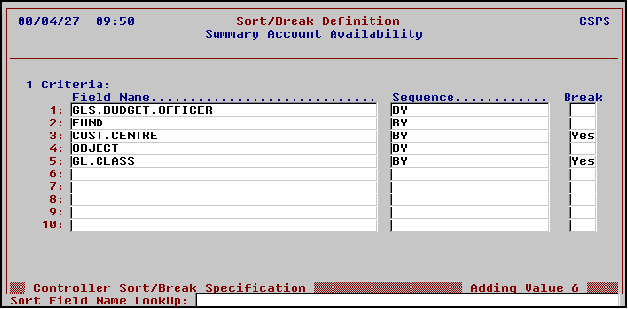
The report can be sorted by Fund (first two digits in the budget code),
Cost Centre (the next eight digits of the budget code) or the object (the last
five digits of the budget code). The sequence can either be ascending or
descending.
A sort has to be selected in order to continue with the process of printing
or viewing the report.
1 Criteria: Select which way the report will be sorted
- Press <ENTER> to move through the screen
- [INPUT] Y into the Break Element in either the Fund, Cost.Centre, or
the Object Field
*NOTE* The report should be sorted by the Cost.Centre. The report can
also be sorted by the General Ledger classes. To sort by GL classes, [INPUT]
Y in the Break element of the cost.center field and then press
<ENTER> till you get past the last Break element. [INPUT] GL.CLASS
and then press <ENTER> twice and [INPUT] Y. Your screen should
appear as shown above.
After a sort has been selected then Press [SAVE] <ENTER>
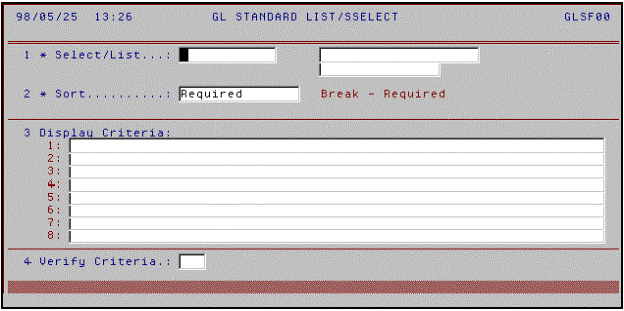
4 Verify Criteria: [INPUT] Y then Press [SAVE] <ENTER>
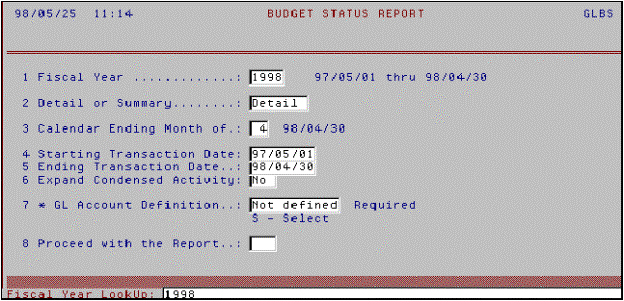
- 8 Proceed with the Report:
- [INPUT] Y To proceed <ENTER> or
- [INPUT] N to cancel the report <ENTER>
- <ENTER>
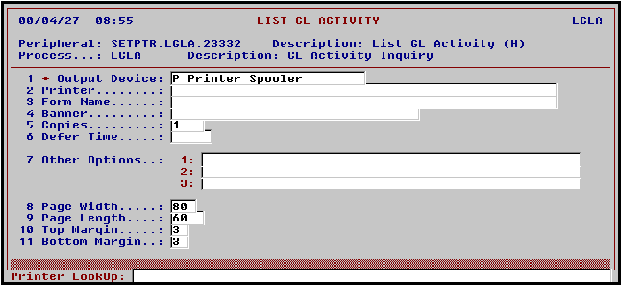
The reports can either be printed out or viewed on screen.
1 * Peripheral Device:
If the report is going to be printed select - P <ENTER>
If the report is going to be viewed on screen select - H <ENTER>
If P is selected then;
- 2 Printer:
- [INPUT] The name of your printer eg. "$PRINTER" or select
your printer from the queue. To view the queue, [INPUT] "..."
(three periods)<ENTER>. Select your printer by typing in the
sequence number corresponding to it <ENTER>
- 3 Copies:
- [INPUT] The number of copies to be printed <ENTER>
If H is selected then no further data has to be entered.
Press [SAVE] <ENTER>
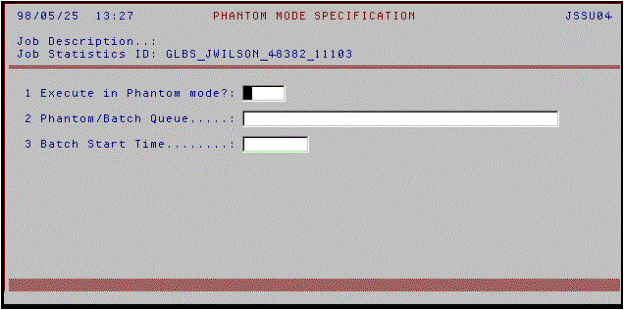
Press [SAVE] <ENTER>
After finishing off screen nine <ENTER> to continue on with
the report. After the status of the report reaches 100%, the report will then
be printed out or be viewed on screen.
To navigate through the report on the screen when H Hold/Browse is
selected:
- Press l for left <ENTER>
- Press r for right <ENTER>
- Press u for page up <ENTER>
- Press d for page down <ENTER>


